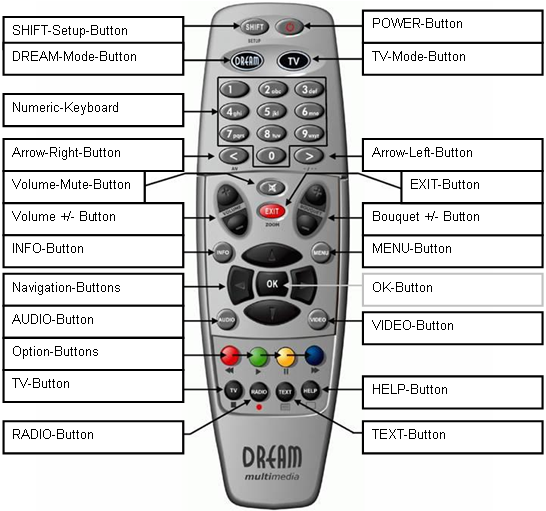
POWER-Button
This Button switches your Neutrino on or off. See Neutrino switching on / off.
TV-Mode-Button
This Button turns the Remote Control into TV-Mode. The TV-Mode-Button flashes shortly, if you press this or any other Button in this Mode. The Remote Control controls now your TV.
DREAM-Mode-Button
This Button turns the Remote Control into Dream-Mode. The Dream-Mode-Button flashes shortly, if you press this or any other Button in this Mode. The Remote Control now controls the Dreambox.
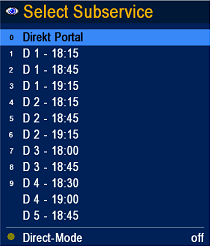
Numeric-Keyboard
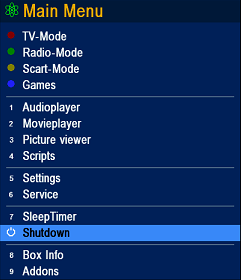
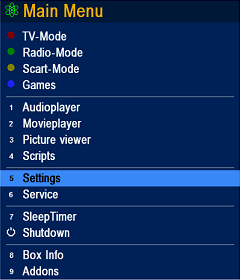
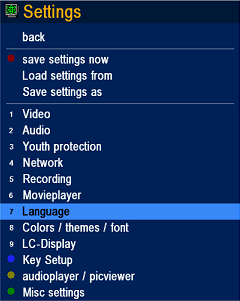
Enter a Service number directly over the Numeric-Keyboard. The Service numbers are on the left Side of the Service list. In the OSD-Main menu are numbers shown in front of the Option or Function, in this case you can enter the desired number to access the Option or Function directly without moving the Cursor beam to it.
Arrow-Left-Button
Arrow-Right-Button
These buttons functions are not set. The user independently appoints them on the special menu. Example. These Buttons can be set to enable to jump back- or forwards through the Servicelist. Once having opened the Servicelist, you are able to jump at the Beginning or the End of the Servicelist.
Volume-Mute-Button
This Button mutes the Volume. A crossed Speaker Symbol will appear on the TV Screen. Pressing it again or the Volume +/- Buttons, brings the Audio back.
EXIT-Button
This Button exits all Menus and aborts Operations.
Volume +/- Button
These Buttons increase (+) or decrease (-) the volume.
Bouquet +/- Button
These Buttons switch through the Bouquets forwards (+) and backwards (-).
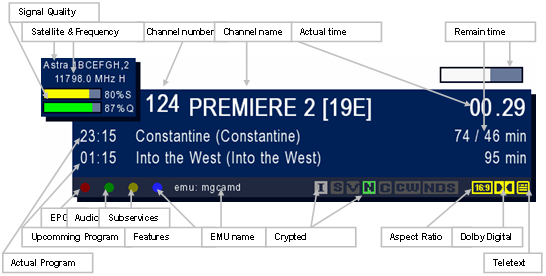
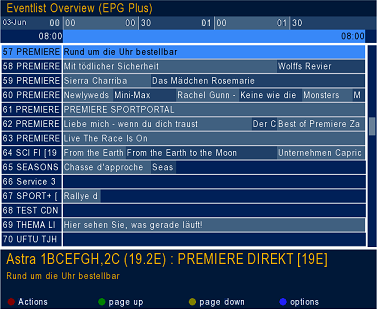
INFO-Button
This Button shows the Infobar if no OSD-Menu is shown. Pressing this Button twice shows the EPG Information of the selected Service. Pressing this Button next loops the font size of EPG Information.
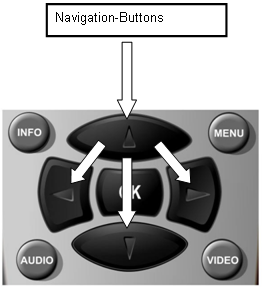
OK-Button
This Button shows the Service list if no OSD-Menu is shown.
This button enters a chosen OSD-Menu Option or Function.
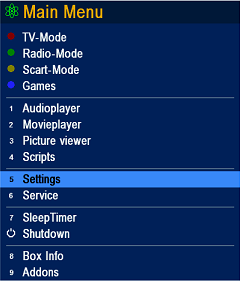
MENU-Button
This Button shows the OSD-Main menu. If a Service list is opened, press this Button to enter the Bouquets list.
AUDIO-Button
The AUDIO-Button shows the available the Audio-Playlist of OSD-Audioplayer menu.
VIDEO-Button
This Button activates the TS MovieBrowser.
Option-Buttons
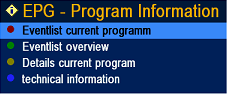
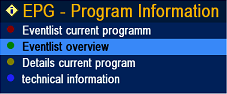
The RED Button activates the EPG – Program Information OSD-menu.
The GREEN Button activates the Select language OSD-menu and shows the available Audio-Tracks of the selected Service.
The YELLOW Button function is not set. The user independently appoints button on the special menu.
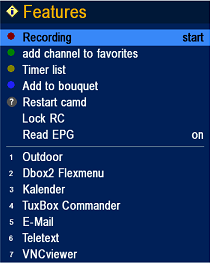
The BLUE Button activates the Features OSD-menu.
TV-Button
This Button activates the TV-Mode. Pressing this Button twice brings up the clock-time. Pressing this Button next hides the clock-time.
HELP-Button
This Button shows the Infobar if no OSD-Menu is shown. Pressing this Button twice shows the EPG Information of the selected Service. Pressing this Button next loops the font size of EPG Information.
RADIO-Button
This Button activates the RADIO-Mode. Pressing this Button twice brings up the clock-time. Pressing this Button next hides the clock-time.
TEXT-Button
This Button activates the Teletext-Software Decoder.